Guide de Semis
Ce guide est rédigé pour les conditions de culture européennes — notre climat, nos types de sols et notre saison de croissance. Suivez ces étapes pour obtenir les meilleurs résultats avec votre mélange de fleurs sauvages Pollinator Seeds.
Quand Semer
Il existe deux fenêtres de semis idéales :
- Automne (septembre — octobre) : Notre fenêtre recommandée. Les graines subissent une stratification naturelle par le froid pendant l'hiver, ce qui favorise une germination plus vigoureuse au printemps. L'humidité automnale réduit le besoin d'arrosage.
- Printemps (mars — mai) : Également efficace, surtout dans les régions où le printemps arrive plus tard. Arrosez pendant les périodes sèches durant les 4 à 6 premières semaines.
Évitez de semer en été (juin-août) lorsque les périodes sèches peuvent tuer les plantules émergentes, ou en hiver (novembre-février) lorsque le sol est trop froid et gorgé d'eau.
Guide Étape par Étape
Préparez Votre Sol
Les fleurs sauvages préfèrent un sol pauvre à modéré — un sol riche et fertile favorise les graminées et les mauvaises herbes. Enlevez la végétation existante en la coupant et en la ratissant. Idéalement, exposez la terre nue. Sur les pelouses, tondez au plus court et ratissez vigoureusement.
Mélangez les Graines avec du Sable
Les graines de fleurs sauvages sont minuscules. Pour une répartition uniforme, mélangez vos graines avec du sable sec dans un rapport de 3:1 (trois parts de sable pour une part de graines). Cela vous aide aussi à voir où vous avez semé.
Semez Uniformément
Épandez le mélange graines-sable uniformément sur votre surface préparée. Pour les grandes surfaces, semez en deux passages à angle droit pour une meilleure couverture. Ne cherchez pas la perfection — la nature ne l'est pas non plus.
Pressez — N'Enterrez Pas
Les graines de fleurs sauvages ont besoin de lumière pour germer. Pressez-les fermement dans la surface du sol en marchant dessus ou en utilisant une planche. Ne les recouvrez PAS de terre ou de compost — c'est l'erreur la plus courante.
Arrosez Si Nécessaire
Si vous semez en automne, les pluies font généralement le travail. Si vous semez au printemps pendant une période sèche, arrosez doucement pendant les 4 à 6 premières semaines jusqu'à ce que les plantules soient établies.
Soyez Patient
Certaines espèces germent en 2 à 3 semaines, d'autres n'apparaîtront qu'au printemps suivant. Une prairie fleurie s'améliore considérablement à partir de la deuxième année, lorsque les vivaces s'établissent.
Sowing Rates
Getting the sowing rate right matters. Too thick and plants compete with each other; too thin and weeds fill the gaps. Here are the recommended rates for our mixes:
| Product | Weight | Coverage | Rate |
|---|---|---|---|
| Pollinator Pocket Garden | 6g | 1–2 sq m | 3–6g per sq m |
| Pollinator Garden Mix | 30g | 6–10 sq m | 3–5g per sq m |
| Pollinator Meadow Patch | 75g | 15–25 sq m | 3–5g per sq m |
| Meadow Restoration | 500g | 100–150 sq m | 3–5g per sq m |
| Full Meadow | 1kg | 200–300 sq m | 3–5g per sq m |
| Bulk Meadow | 5kg | 1,000–1,500 sq m | 3–5g per sq m |
Tip: For overseeding into existing grassland (rather than bare soil), increase the rate to 5–7g per sq m to compensate for competition from established grass.
Mix-Specific Sowing Guidance
Our specialist mixes are designed for specific conditions. Each one needs a slightly different approach.
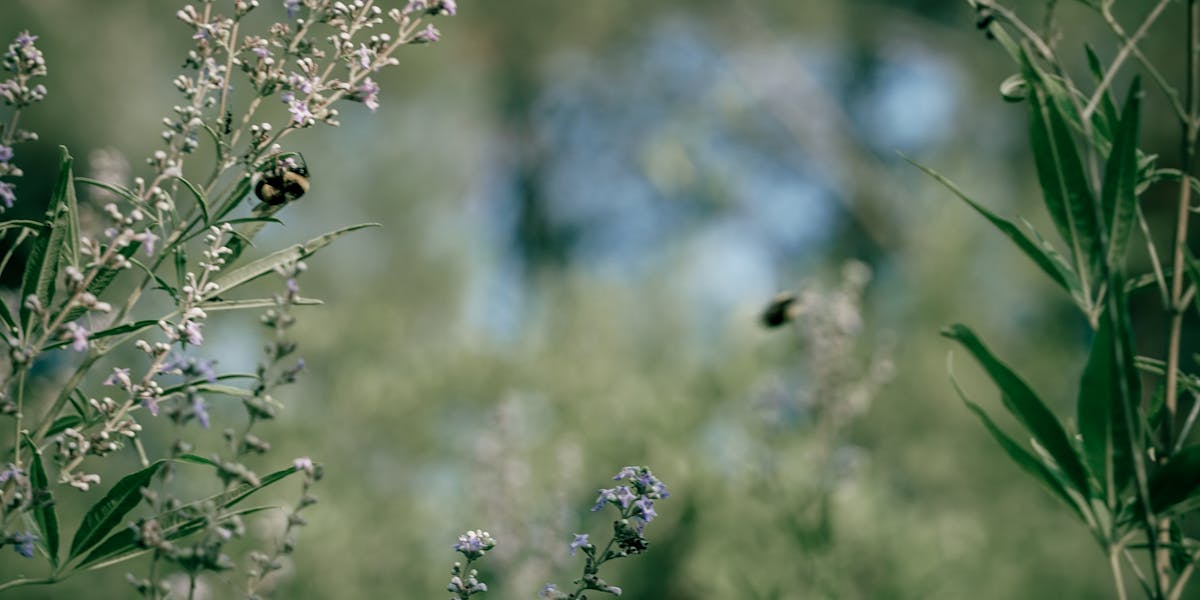
Bee Rescue Mix
Optimised for maximum nectar and pollen output. Sow on open, sunny ground — bees need warmth. Avoid heavily shaded areas. Works well in garden borders, along fences, and in dedicated pollinator strips. Sow at 3–5g per sq m on prepared bare soil.
Butterfly Garden Mix
Butterflies need both nectar plants (adults) and larval food plants (caterpillars). This mix includes both. Sow in a sunny, sheltered spot — butterflies avoid wind. A south-facing border backed by a wall or hedge is ideal. Leave some areas of long grass nearby for egg-laying.
Shade Meadow Mix
Designed for areas receiving less than 4 hours of direct sunlight — under trees, along north-facing walls, beneath hedgerows. These species tolerate shade but still need some light. Prepare soil as normal but expect slower establishment. Sow at 4–6g per sq m.
Clover Lawn Mix
This is an overseeding mix — sow directly into your existing lawn. Mow short, scarify vigorously with a rake to expose soil, then broadcast seed. Roll or walk over to press in. Keep mowing at 5–8cm height through the first season. The clover fixes nitrogen, feeding the lawn without fertiliser.
Bogland Pollinator Mix
For wet, acidic, peaty ground — bog margins, damp field corners, pond edges, and rushy pasture. Do not drain or lime the soil; these species need it as it is. Light surface disturbance is enough. Sow in autumn when ground is naturally moist. See our Bogland Pollinators page for the full species guide.
Pollinator Cover Crop
A fast-growing annual mix for temporary ground cover between crops or on fallow land. Sow April–August on any cultivated ground. Broadcast at 5–8g per sq m. Flowers within 6–8 weeks. Dig in or mow before the next crop. Adds organic matter, suppresses weeds, and feeds pollinators while the land would otherwise be bare.
Sowing Hedgerow Margins
The strip of ground at the base of a hedgerow — typically 1–2 metres wide — is some of the most valuable habitat on any farm. It's sheltered, undisturbed, and ideally suited to wildflowers. If you're in ACRES, you're already being paid to leave these margins uncultivated. Adding wildflowers turns a compliance requirement into a genuine biodiversity gain.
How to sow a hedgerow margin
- Timing: Autumn (September–October) is best. The hedge provides shelter, and autumn moisture aids germination.
- Preparation: Lightly disturb the surface with a rake or harrow. You don't need bare soil — just break through the thatch enough for seed-to-soil contact. Heavy cultivation is unnecessary and disrupts the root network of the hedge.
- Sowing: Use our Pollinator Garden Mix or Shade Meadow Mix (for north-facing hedges). Sow at 4–6g per sq m. Mix with sand as usual for even distribution.
- Species to expect: Foxglove, red campion, primrose, wild garlic, hedge woundwort, and other woodland-edge species will establish naturally alongside your sown wildflowers. The hedge provides seed sources of its own.
- Management: Cut once a year in late September — after the hedge cutting season opens. Remove cuttings. Do not spray the margin.
Hedgerows and wildflower margins are not separate habitats — they are two halves of the same system. Get the hedge management right, sow the right seed at the base, and you have a corridor of life running through your farm. Read our full guide to Irish hedgerow laws to stay compliant.
Sowing Heritage Grains

Growing grain at home is more achievable than most people think. A plot of 4–5 square metres — roughly the size of a large raised bed — can produce enough grain for several loaves of bread. Our three heritage grains each have slightly different requirements:
Einkorn
Sow: October–November (winter type) or March (spring type).
Soil: Tolerates poor, thin soils well. Prefers well-drained ground.
Spacing: Broadcast at 15–20g per sq m, rake in lightly.
Harvest: July–August when ears are golden and grain is hard. Thresh, winnow, and mill fresh with a stone hand mill.
Emmer Wheat
Sow: October–November (winter type preferred in Ireland).
Soil: Moderate fertility. Handles heavier soils better than einkorn.
Spacing: Broadcast at 15–20g per sq m.
Harvest: July–August. Emmer is a hulled wheat — the grain stays enclosed in its husk after threshing. You'll need to dehull before milling.
Heritage Rye
Sow: September–October (rye establishes fast and benefits from early sowing).
Soil: Thrives in poor, acidic, sandy soils where wheat fails — ideal for much of Ireland.
Spacing: Broadcast at 12–18g per sq m.
Harvest: July. Rye is easier to thresh than wheat and produces dense, dark flour perfect for sourdough.
For the complete growing, threshing, milling, and baking guide, see our Heritage Grain Growing Guide. Our Heritage Grain Milling Kit includes a stone hand mill and all three grain varieties — everything you need from sowing to flour.
Aftercare
Entretien de la 1ère Année
La première année, des mauvaises herbes annuelles peuvent apparaître aux côtés de vos fleurs sauvages. Si les mauvaises herbes sont nettement plus hautes que les fleurs sauvages, coupez toute la surface à environ 10 cm en plein été. Cela freine les mauvaises herbes tout en permettant aux fleurs sauvages de se rétablir.
N'utilisez PAS d'herbicide — il tuerait aussi vos fleurs sauvages.
Entretien à Partir de la 2e Année
Une fois établie, une prairie fleurie demande très peu d'entretien :
- Fauchez une fois par an fin août ou en septembre
- Laissez les coupes sécher 2 à 3 jours (pour que les graines tombent au sol)
- Retirez toutes les coupes — cela réduit la fertilité du sol, ce qui favorise les fleurs sauvages par rapport aux graminées
- C'est tout. Pas d'engrais, pas d'arrosage, pas de désherbage.
Year 3+: What to Expect
By year three, your meadow should be a self-sustaining system. Perennials like knapweed, oxeye daisy, and bird's-foot trefoil will dominate, flowering reliably year after year. You may notice new species appearing that you didn't sow — wind, birds, and insects bring seed from surrounding habitat. This is a sign of a healthy, functioning meadow.
Continue the single annual cut in late August or September. The golden rule remains: always remove the cuttings. Leaving them on the ground enriches the soil, which favours grasses over wildflowers. On a farm, the cuttings make decent mulch for garden beds or paths.
How Our Plants Improve Soil
Wildflowers and cover crops aren't just beautiful — they actively build healthier soil. Here's what's happening underground when you sow our mixes.
Nitrogen Fixation
Legumes in our mixes — red clover, white clover, bird's-foot trefoil, tufted vetch — host Rhizobium bacteria in their root nodules. These bacteria capture nitrogen from the air and convert it into plant-available fertiliser. Red clover alone fixes 150–250 kg of nitrogen per hectare per year — equivalent to a heavy application of synthetic fertiliser, delivered for free.
Products: Clover Lawn Mix, Red Clover Seeds, Cover Crop, all standard wildflower mixes
Breaking Compaction
Deep-rooted species physically break through compacted soil layers, creating channels for water, air, and future roots. Heritage rye roots reach 1.5 metres deep. Phacelia's dense root system penetrates compacted layers and decomposes rapidly when dug in, leaving organic matter throughout the soil profile.
Products: Heritage Rye Seeds, Phacelia Seeds, Cover Crop
Building Organic Matter
Perennial wildflowers shed and regrow roots continuously, building stable soil carbon year on year. Cover crops add fast-decomposing biomass when dug in. Each 1% increase in organic matter allows soil to hold an additional 75,000 litres of water per hectare — critical in both drought and heavy rain.
Products: Cover Crop, Buckwheat, all meadow mixes
Weed Suppression
Heritage rye releases chemicals (allelopathy) that suppress weed seed germination around it. Buckwheat and clover smother weeds with dense canopy cover. A well-established cover crop reduces weed emergence in the following crop by 60–80%.
Products: Heritage Rye, Buckwheat, Clover Lawn Mix
For the full science behind soil improvement with wildflowers and cover crops, read our blog post: How Wildflowers Improve Soil Quality.
Modernised Fallow Planting
Bare fallow wastes a growing season, erodes soil, and kills soil biology. Modernised fallow sows pollinator-friendly cover crops on resting land — building soil, fixing nitrogen, and feeding bees while the land recovers.
Quick Decision Guide
| Situation | What to Sow | When |
|---|---|---|
| Empty bed (spring/summer) | Pollinator Cover Crop | April–August |
| Empty bed (winter) | Heritage Rye Seeds | September–October |
| Fallow field (ACRES) | Pollinator Cover Crop | April–May |
| Compacted ground | Phacelia + Red Clover | March–August |
| Weedy plot | Buckwheat (fast smother) | April–July |
| Post-harvest stubble | Pollinator Cover Crop | July–August |
How to incorporate: When you're ready for the next crop, mow or dig the cover crop into the top 15–20cm of soil. Leave 2–3 weeks for decomposition before planting. The chopped biomass feeds soil biology and releases nitrogen for your next planting.
For the full strategy including ACRES eligibility, nitrogen fixation numbers, and historical context, read our blog post: Modernised Fallow Planting: Why Resting Land Should Still Be Working.
Conseils Selon le Type de Sol
- Sols argileux : Ajoutez du gravier ou du sable grossier pour améliorer le drainage avant de semer
- Sols acides : La plupart des mélanges de fleurs sauvages s'y adaptent bien ; évitez le chaulage
- Sol de jardin riche : Retirez les 5 premiers centimètres de terre végétale pour réduire la fertilité — les fleurs sauvages prospèrent dans un sol plus pauvre
- Sols sableux/littoraux : Excellents pour les fleurs sauvages avec un minimum de préparation
A note on fertility: This is counterintuitive, but wildflowers prefer poor soil. On fertile ground, vigorous grasses outcompete slower-growing wildflowers. If your soil is very rich (dark, crumbly, well-fed garden soil), either strip the top 5cm of topsoil before sowing or add yellow rattle to your mix — it parasitises grass roots and weakens them, giving wildflowers space to establish. Our standard mixes already include species suited to moderate Irish soils.
Common Mistakes
We see these regularly. Avoid them and your results will be dramatically better:
Burying the seed
The number one mistake. Most wildflower seeds need light to germinate. Press them into the surface — never cover with soil or compost. If you can't see the seeds on the surface after sowing, they're too deep.
Sowing into uncleared grass
Scattering seed onto an existing lawn or meadow without preparation is a waste of seed. Established grass will smother the seedlings. You must expose bare soil — at minimum, scalp and scarify. The clover lawn mix is the exception, as clover is vigorous enough to compete.
Feeding the soil
Do not add compost, fertiliser, or manure to a wildflower area. It helps grasses, not flowers. Wildflowers evolved on poor ground. The poorer the soil, the better they compete.
Giving up after year one
Year one often looks weedy and disappointing. Annual weeds germinate fast and tower over slow-growing perennials. This is normal. The perennials are establishing root systems underground. By year two, the meadow transforms. Patience is the most important tool you have.
Mowing too often
A wildflower meadow is not a lawn. Once established, cut once a year in late August or September. More frequent mowing removes flowers before they set seed and starves pollinators of forage.
Using herbicide nearby
Herbicide drift from adjacent spraying can devastate a wildflower area. Maintain an unsprayed buffer of at least 2 metres. If you're in ACRES, this is already a scheme requirement for field margins.
Month-by-Month Calendar
What to do and what to expect, season by season. This applies to established meadows (year 2+). Year one is mostly about patience and weed management.
January – February
Do: Nothing. Leave the meadow alone. Dead stems provide overwintering shelter for insects.
Expect: First green shoots of primrose and ground ivy. Early bumblebee queens may emerge on mild days.
March – April
Do: Spring sowing window opens (March–May). Plan new areas. Order seed.
Expect: Dandelions, primrose, and cowslips provide early nectar. Last chance to sow heritage grains (spring varieties).
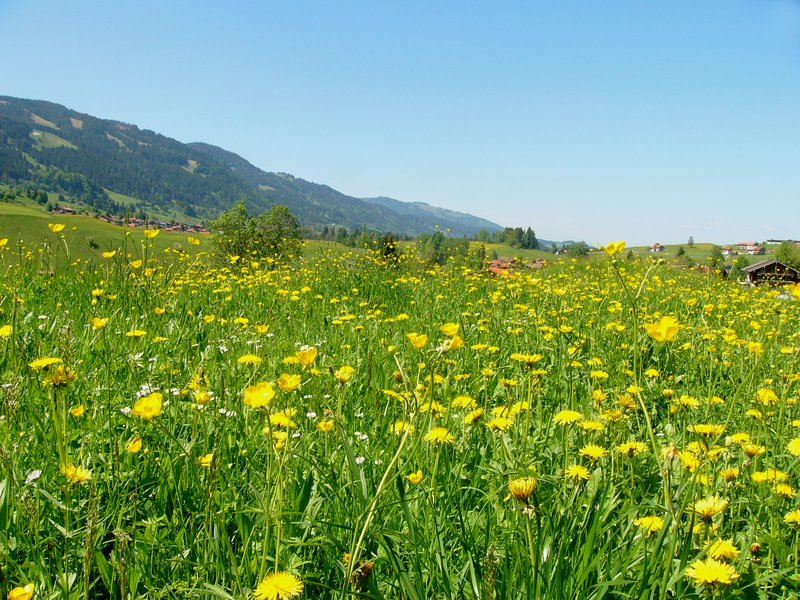
May – June
Do: Enjoy the show. Resist the urge to mow. Mark your meadow so others know it's intentional, not neglected.
Expect: Oxeye daisy, red clover, bird's-foot trefoil, and buttercups in full flower. Peak pollinator activity begins.
July – August
Do: Year 1 only: if weeds are very tall, cut to 10cm in mid-July and leave wildflowers to recover. Year 2+: leave until late August.
Expect: Knapweed, field scabious, and wild marjoram at their peak. Butterflies everywhere. Harvest heritage grains.
September – October
Do: Cut the meadow in late August or early September. Leave cuttings 2–3 days, then remove. This is also the prime autumn sowing window for new areas.
Expect: Devil's-bit scabious provides late forage. Ivy flowers on the hedgerows. Sow new wildflower areas and heritage grains now.
November – December
Do: Leave dead stems standing — they shelter overwintering insects and look beautiful with frost. Tidy paths, not the meadow itself.
Expect: Seeds dropping and settling into the soil. The meadow is recharging for next year.
ACRES & Agri-Environment Scheme Compliance

If you're sowing wildflowers as part of an ACRES plan or other agri-environment scheme, there are specific requirements to be aware of. Getting these right protects your payments and ensures your work delivers real biodiversity outcomes.
- Seed provenance: Many ACRES actions require certified native provenance seed. Our mixes use verified Irish-provenance native seed from DAFM-registered producers. We can provide documentation of provenance on request.
- Species composition: ACRES may specify which species are required or prohibited. Check your plan with your advisor before ordering. We publish full species lists for every mix and can advise on suitability.
- Sowing rates: Scheme rates typically specify 3–5g of wildflower seed per square metre. Our product coverage figures are calibrated to these rates.
- Unsprayed margins: Field margins under ACRES must be left unsprayed and uncultivated. Sow wildflowers into these margins to maximise their biodiversity value — see Hedgerow Margins above.
- Record keeping: Keep your seed purchase receipt, species list, and sowing date. These may be needed for inspections. We include species lists with every order.
- Hedgerow cutting: Remember the Wildlife Act closed season: no hedgerow cutting from 1 March to 31 August. This is a legal requirement and a cross-compliance condition. See our full guide to Irish hedgerow laws.
For more detail on ACRES payments and how wildflower sowing fits into your plan, read our blog post on the ACRES scheme.